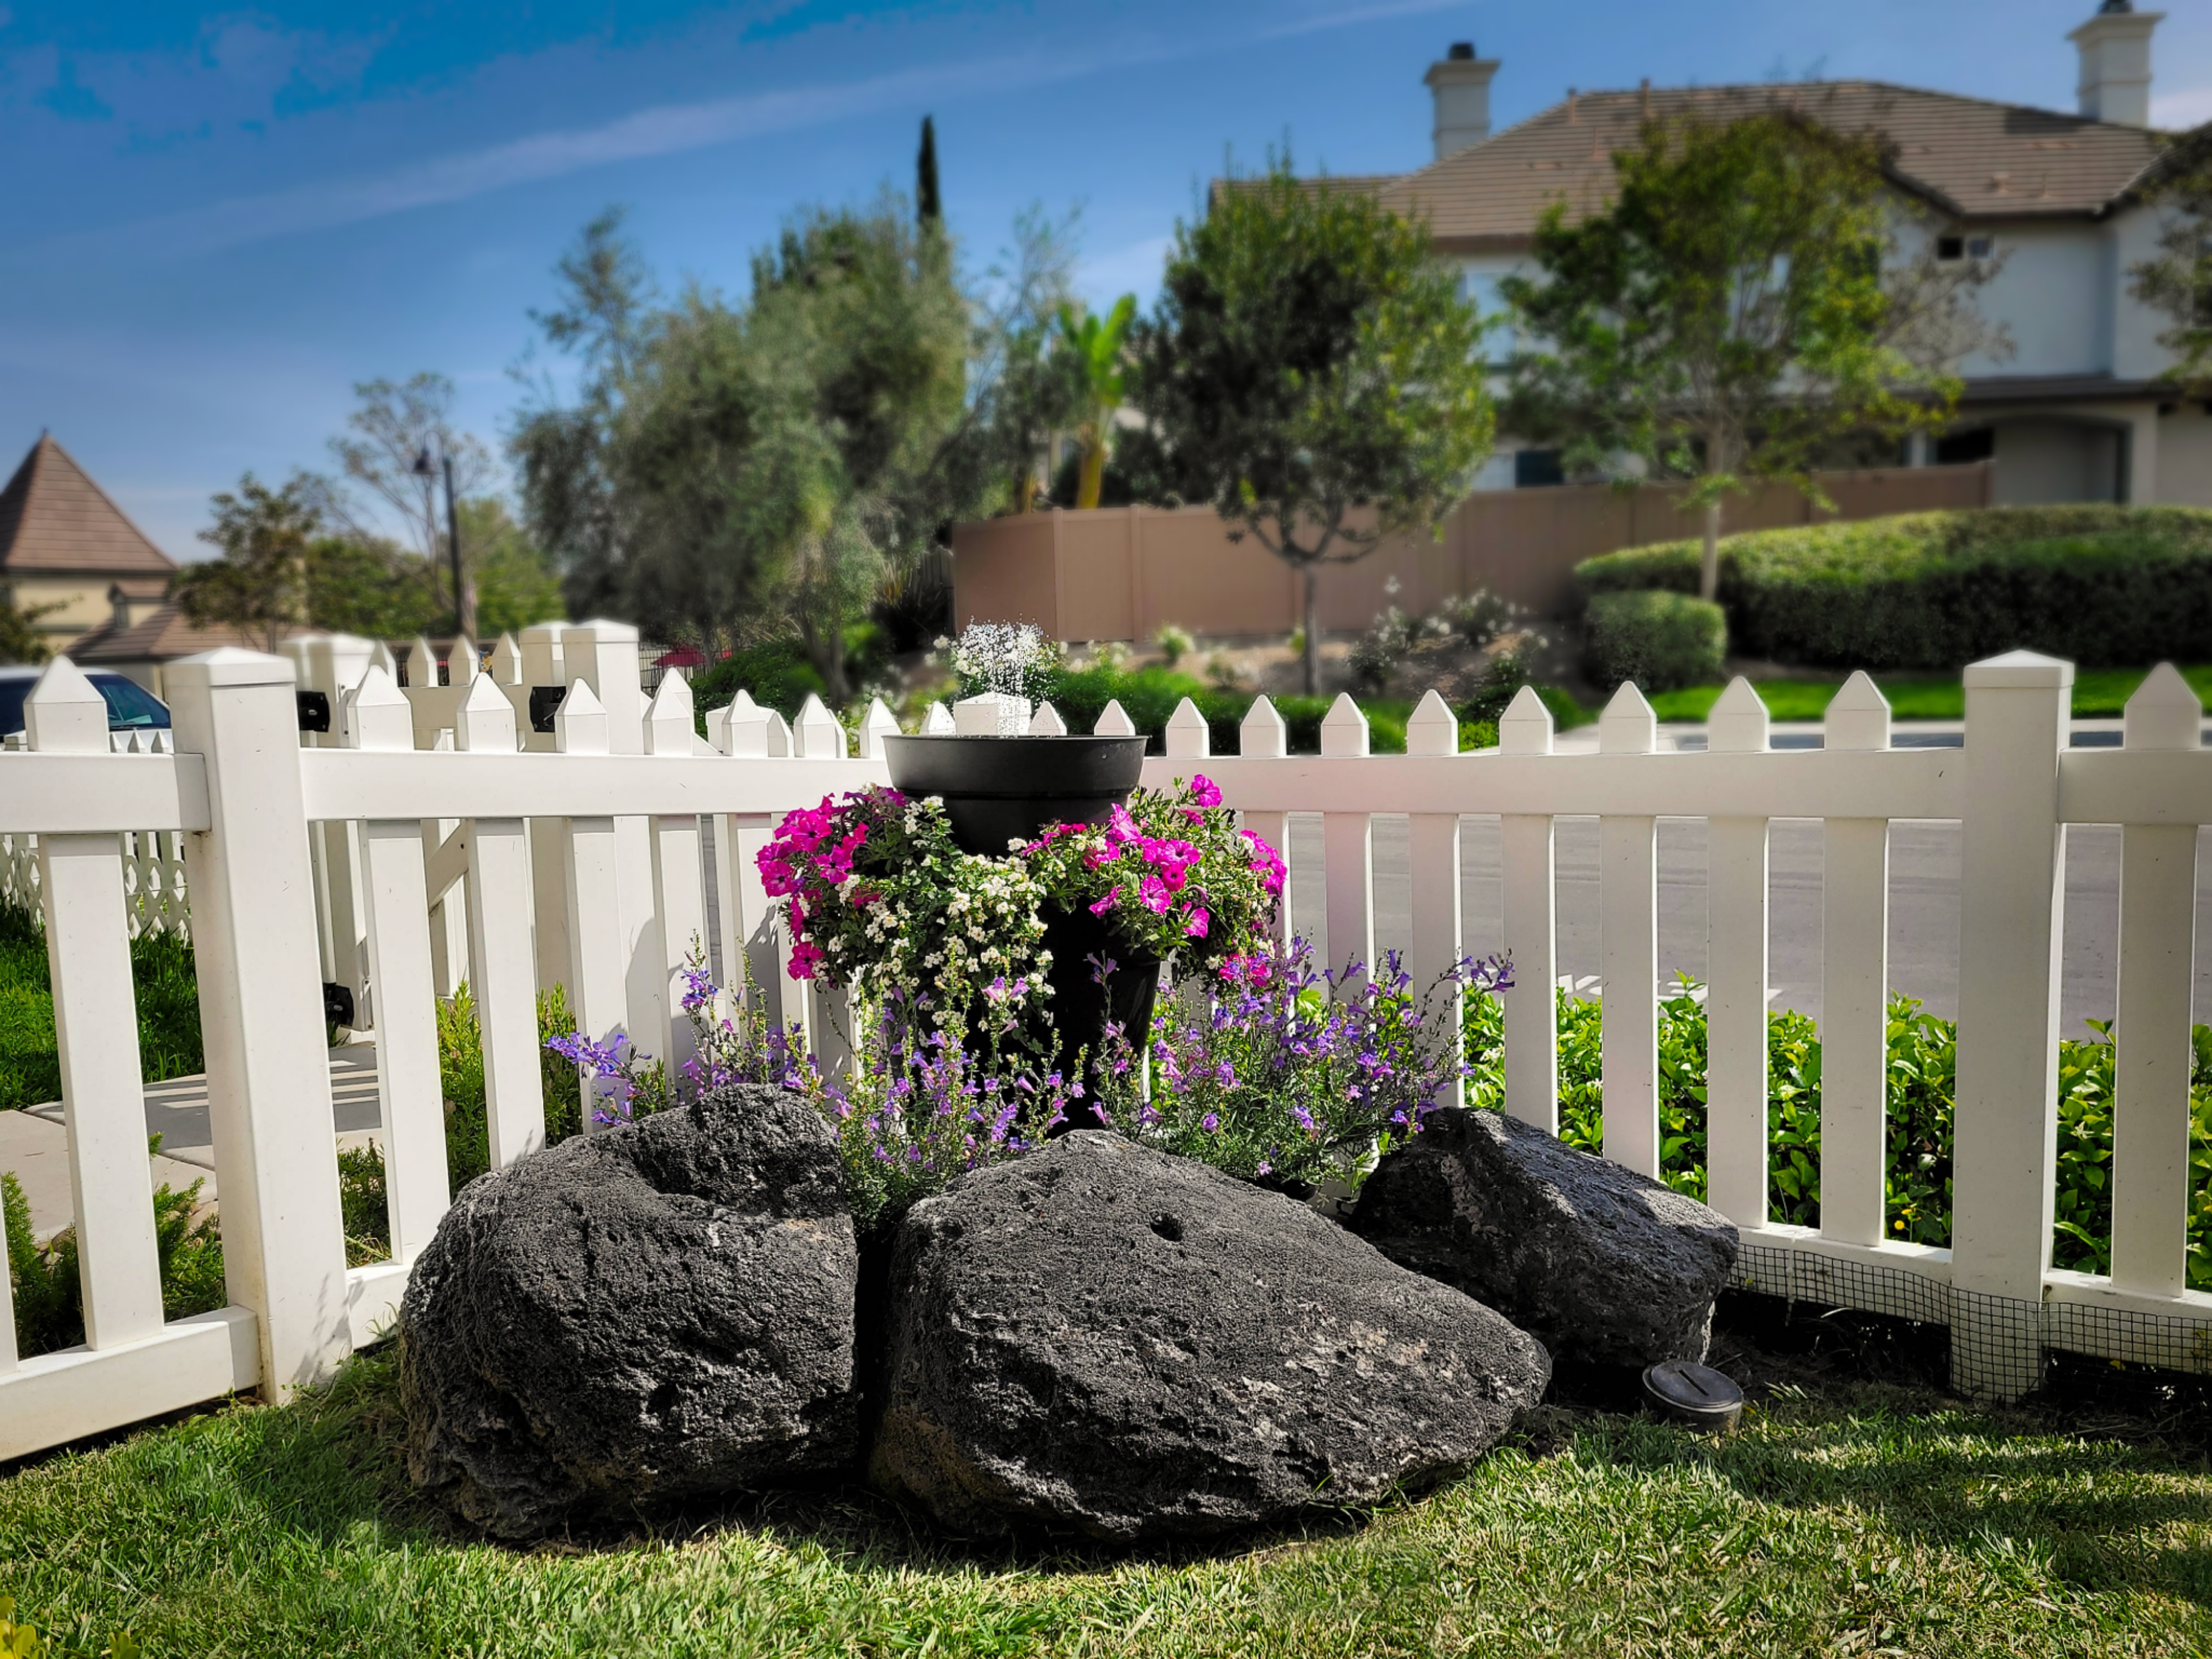


We have really enjoyed the changes we've made to our quaint little outdoor space, but there was one corner that wasn't too good-looking. On the left corner of our yard, behind some big lava rocks, we have some ornamental grass that has been somewhat neglected and because of that, has grown into a big dry and brittle mess.
 |
| the bush actually looks decent in this pic :) |
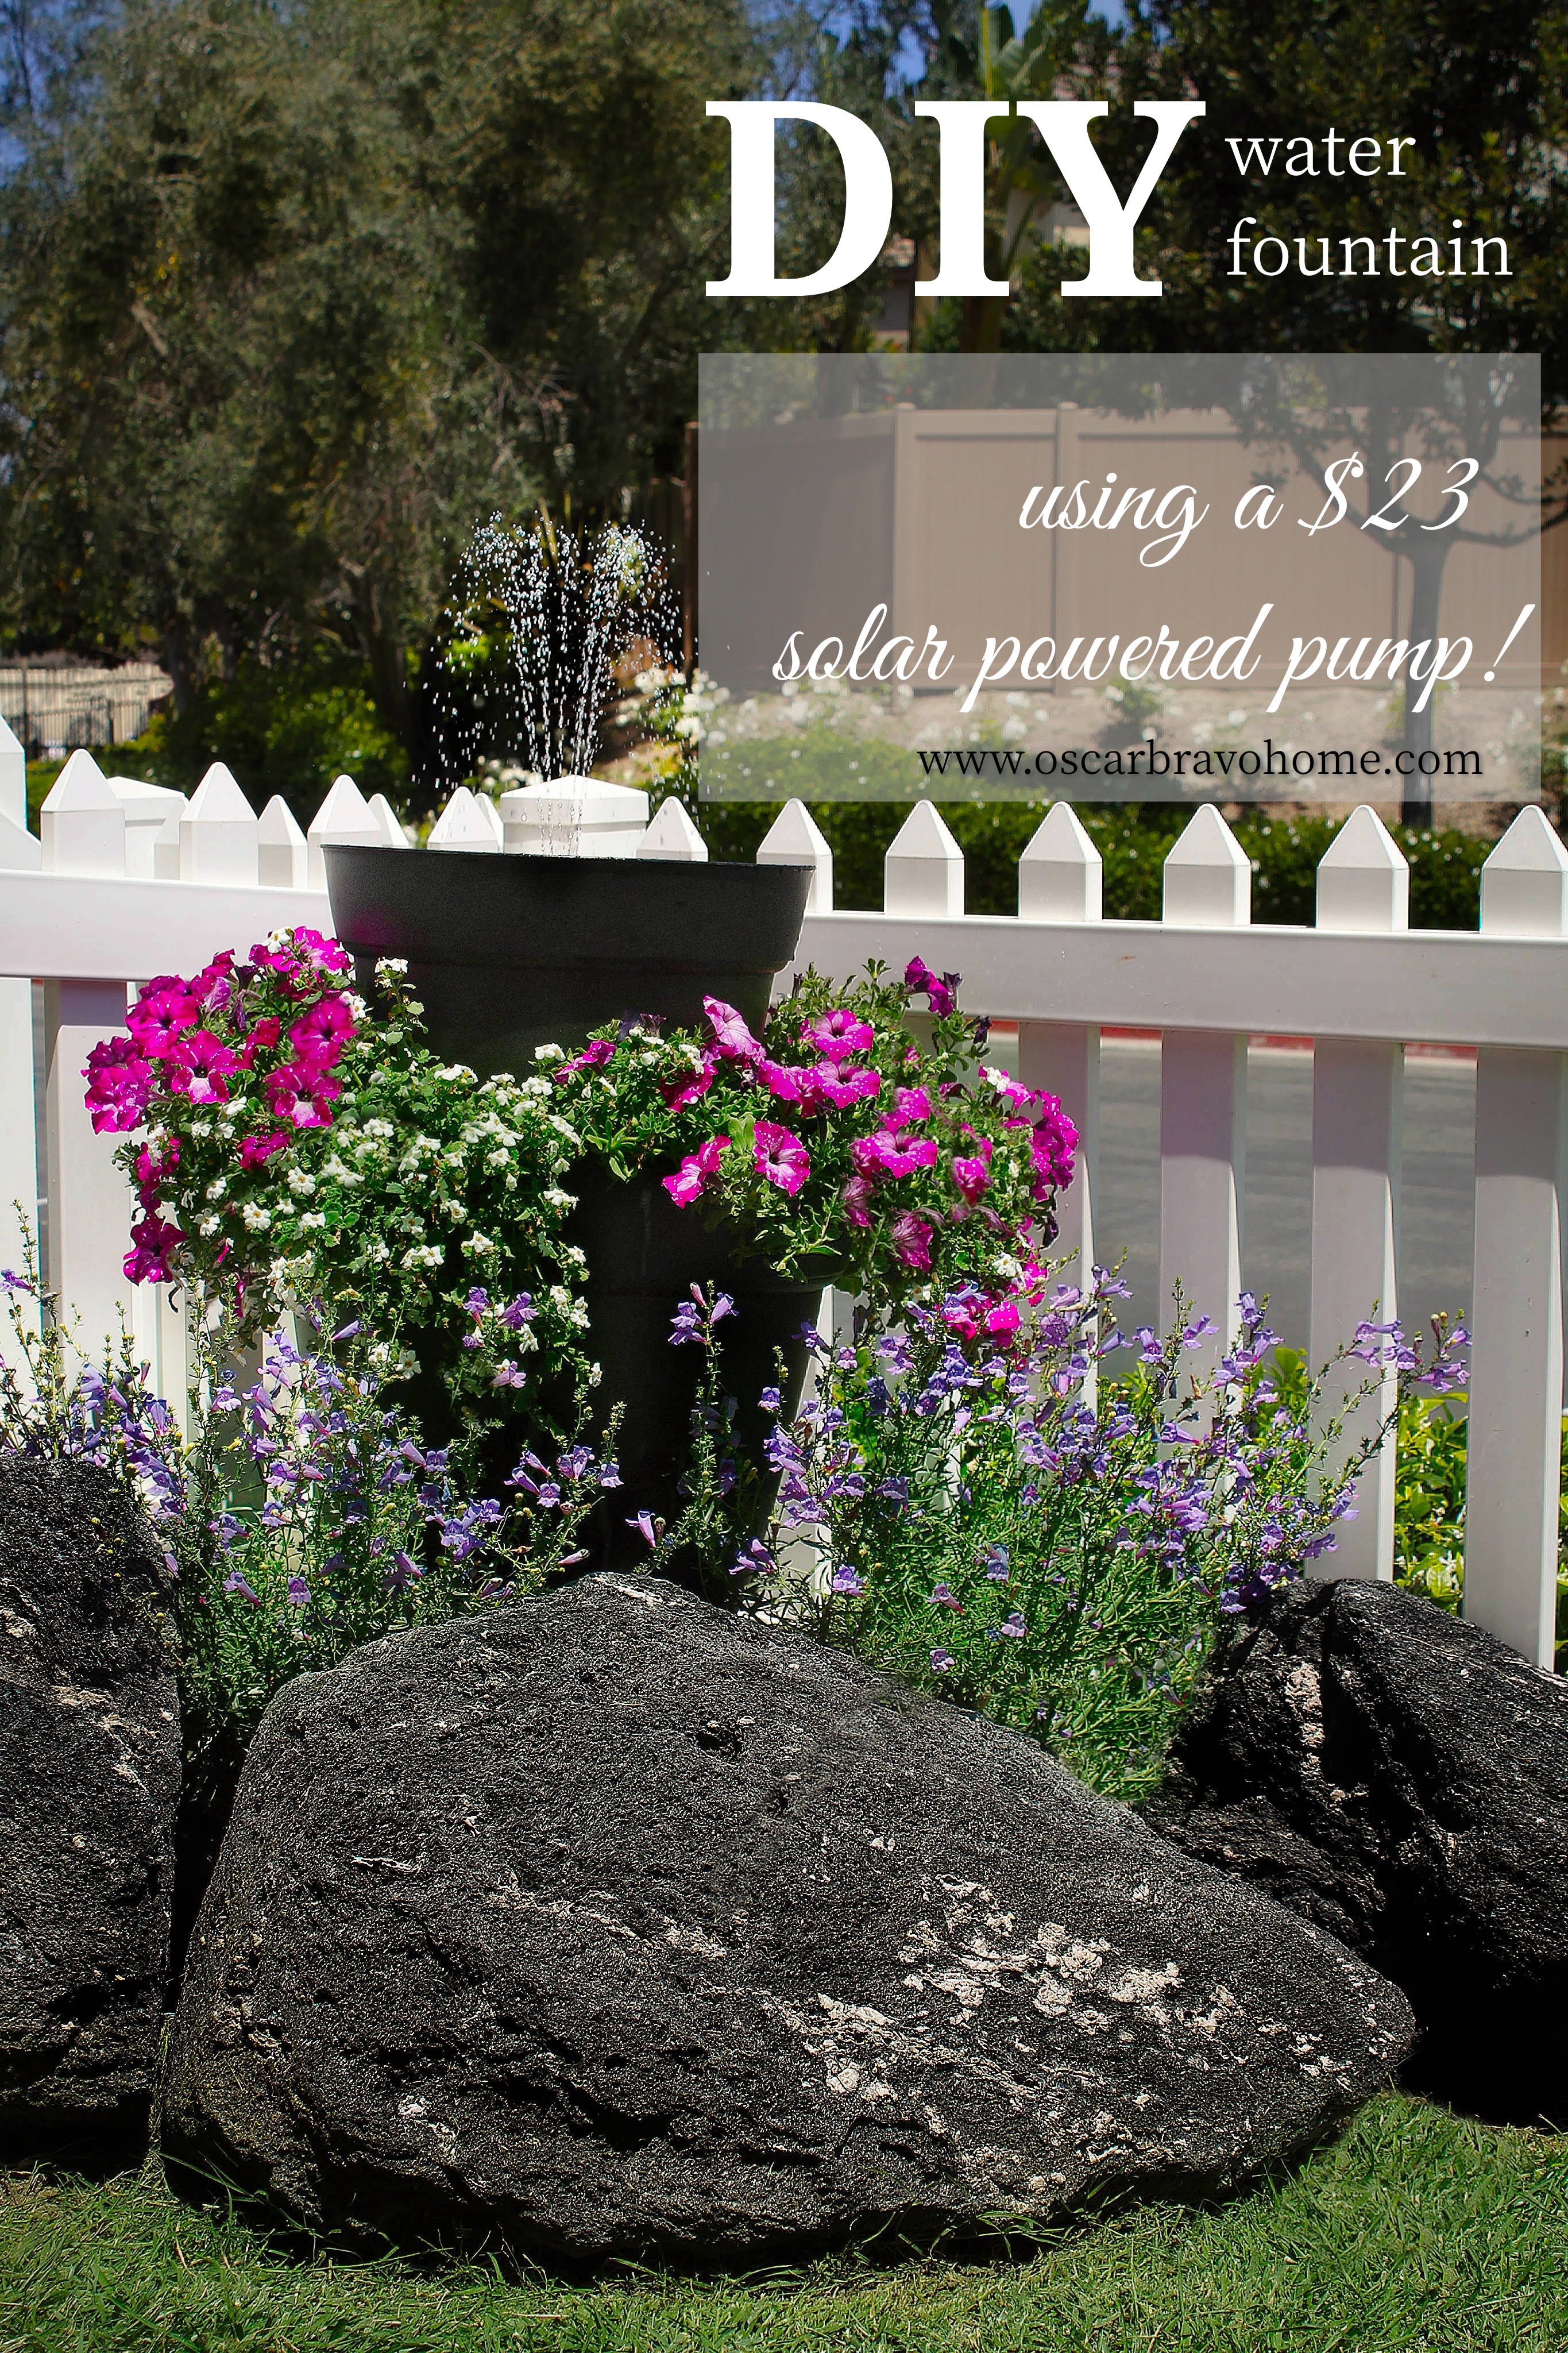
This corner of our yard is a major sight line and is visible in almost every area of our home in the first floor and that is a big reason to make sure that this little part of our yard looks decent. We were all really tired of looking at that mound of dead grass. My wife loves the sound of water so I thought that having a water feature would be a great idea. The only problem with installing a water feature like a water fountain would be that I would have to install plumbing and electrical which I really didn't want to do. I decided to search some options thinking that maybe I could find a solar powered water fountain that wouldn't need any electricity to run on. That's when I came across this neat little solar powered water fountain pump! I actually found A LOT of options for solar powered water fountain pumps to the point that I was hesitant to buy any for fear of not choosing a good one. I found one that had good reviews and also had other features like different water spout options and that could store energy for it to run for a bit when the pump isn't getting direct sunlight. Once I felt comfortable about my choice I went ahead and placed my order.
Now that I had a pump, I needed a water fountain. I immediately thought of just using a bird bath which would have been fine but I wanted something with more visual weight. The base of the birdbaths I came across were all pretty thin and I felt it would look flimsy in between the big lava rocks. In my search for ideas I came across some DIY water fountains on Pinterest where people made them using pots. I decided it was time to visit my local Home Depot to see what their inventory in large pots was. I ended up purchasing a couple of black plastic planters that were big enough to take up the space in that corner where the bush was. The planters were nothing special but the size, color and price was perfect!
The setup for our new fountain was so easy! I think it must have taken less than 30 minutes to set it up and that afternoon we were having lunch outside while enjoying our new little water feature!
Interested in making your own water fountain? Here is what you need:
large plastic planter (click here for link)
medium plastic planter (click here for link)
sturdy plastic pail (same depth as the large planter)
rocks to weigh down planters
plastic saucer that is about the same width as the large planter
flowers to fill the space in between the planters (or you can use river rocks)
solar powered water pump (click here for link)
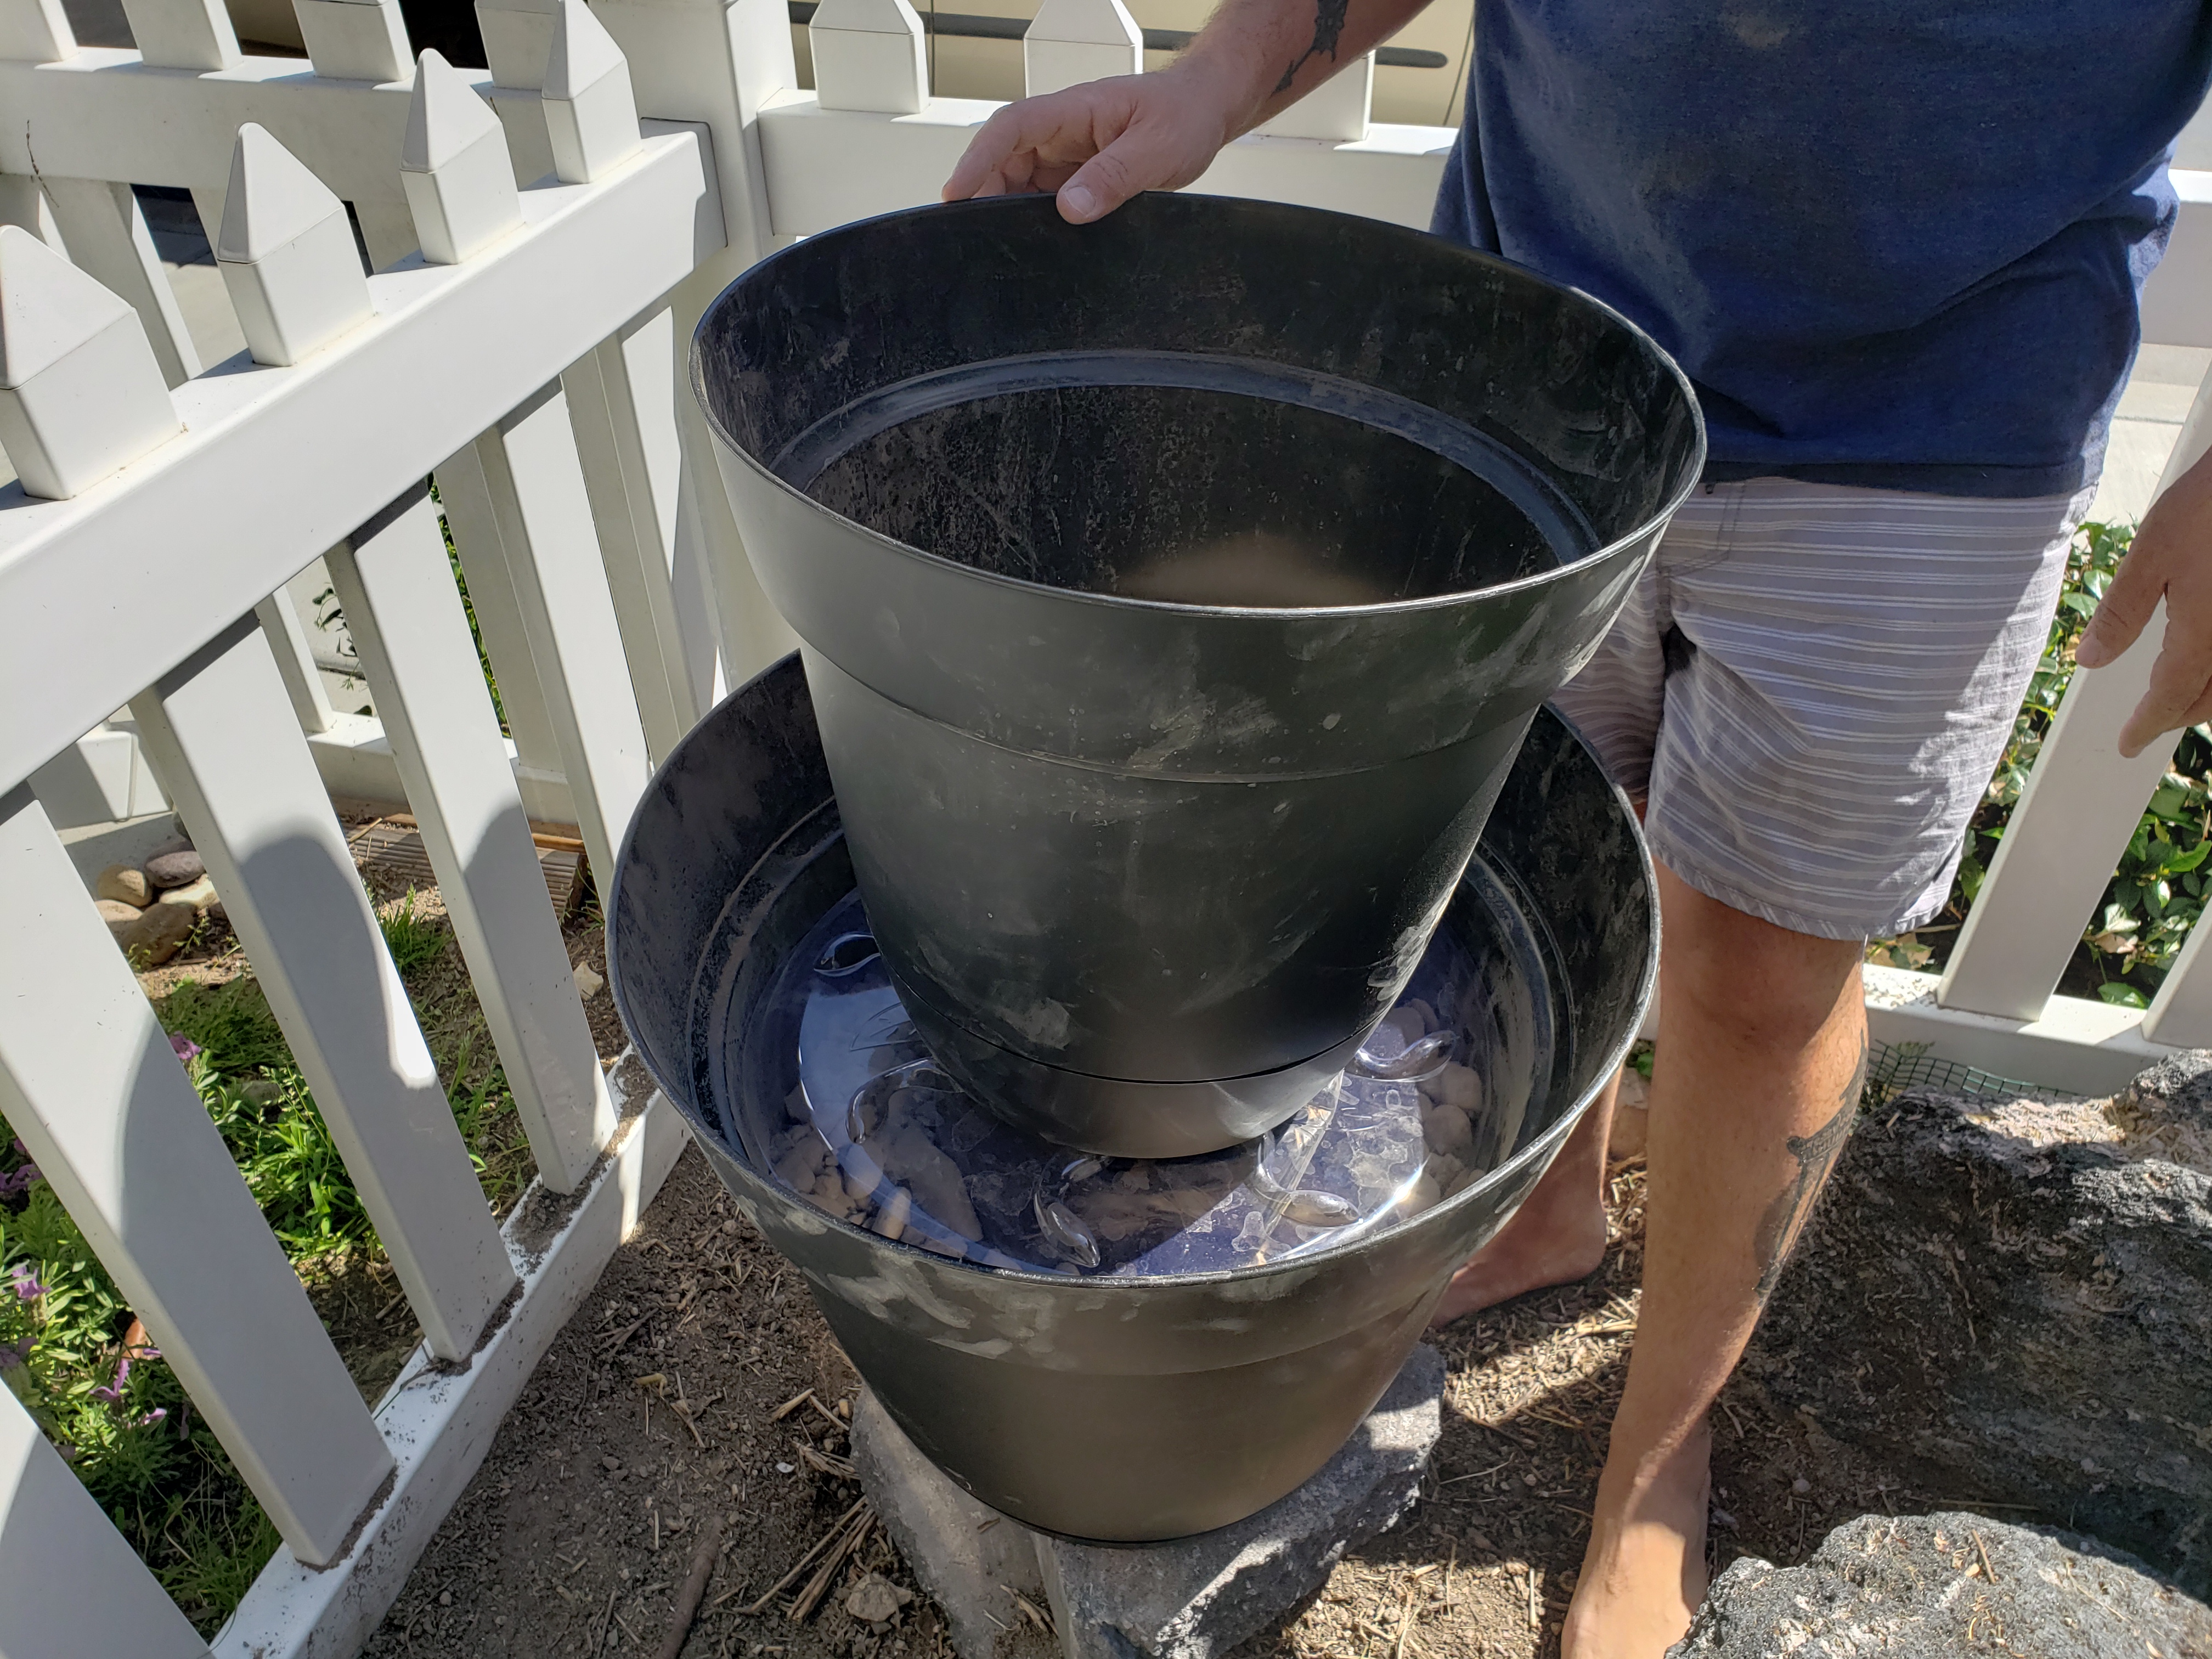
The setup is pretty straightforward. I placed the bigger planter on top of some concrete pavers to give it height. Then I added a sturdy plastic trash bin inside of the planter and filled with some river rocks. The plastic trash bin creates a sturdy base for the smaller planter that will go on top. Before placing the smaller top planter, I added a plastic saucer to keep my filler from falling all the way to the bottom, In my case it was soil and potted plants but it can also be river rocks.
After placing the small planter on the top. I added another saucer that happens to be just the right size and sits halfway down the smaller planter. That makes it so that the planter doesn't need to be filled with water but I could have easily used black river rocks to take up space.
After my fountain was set up, it was time to add the final touches. I placed the flowers in between the two planters, added water to the top of the pot, placed my little solar powered water pump and just like that, we had a fountain!


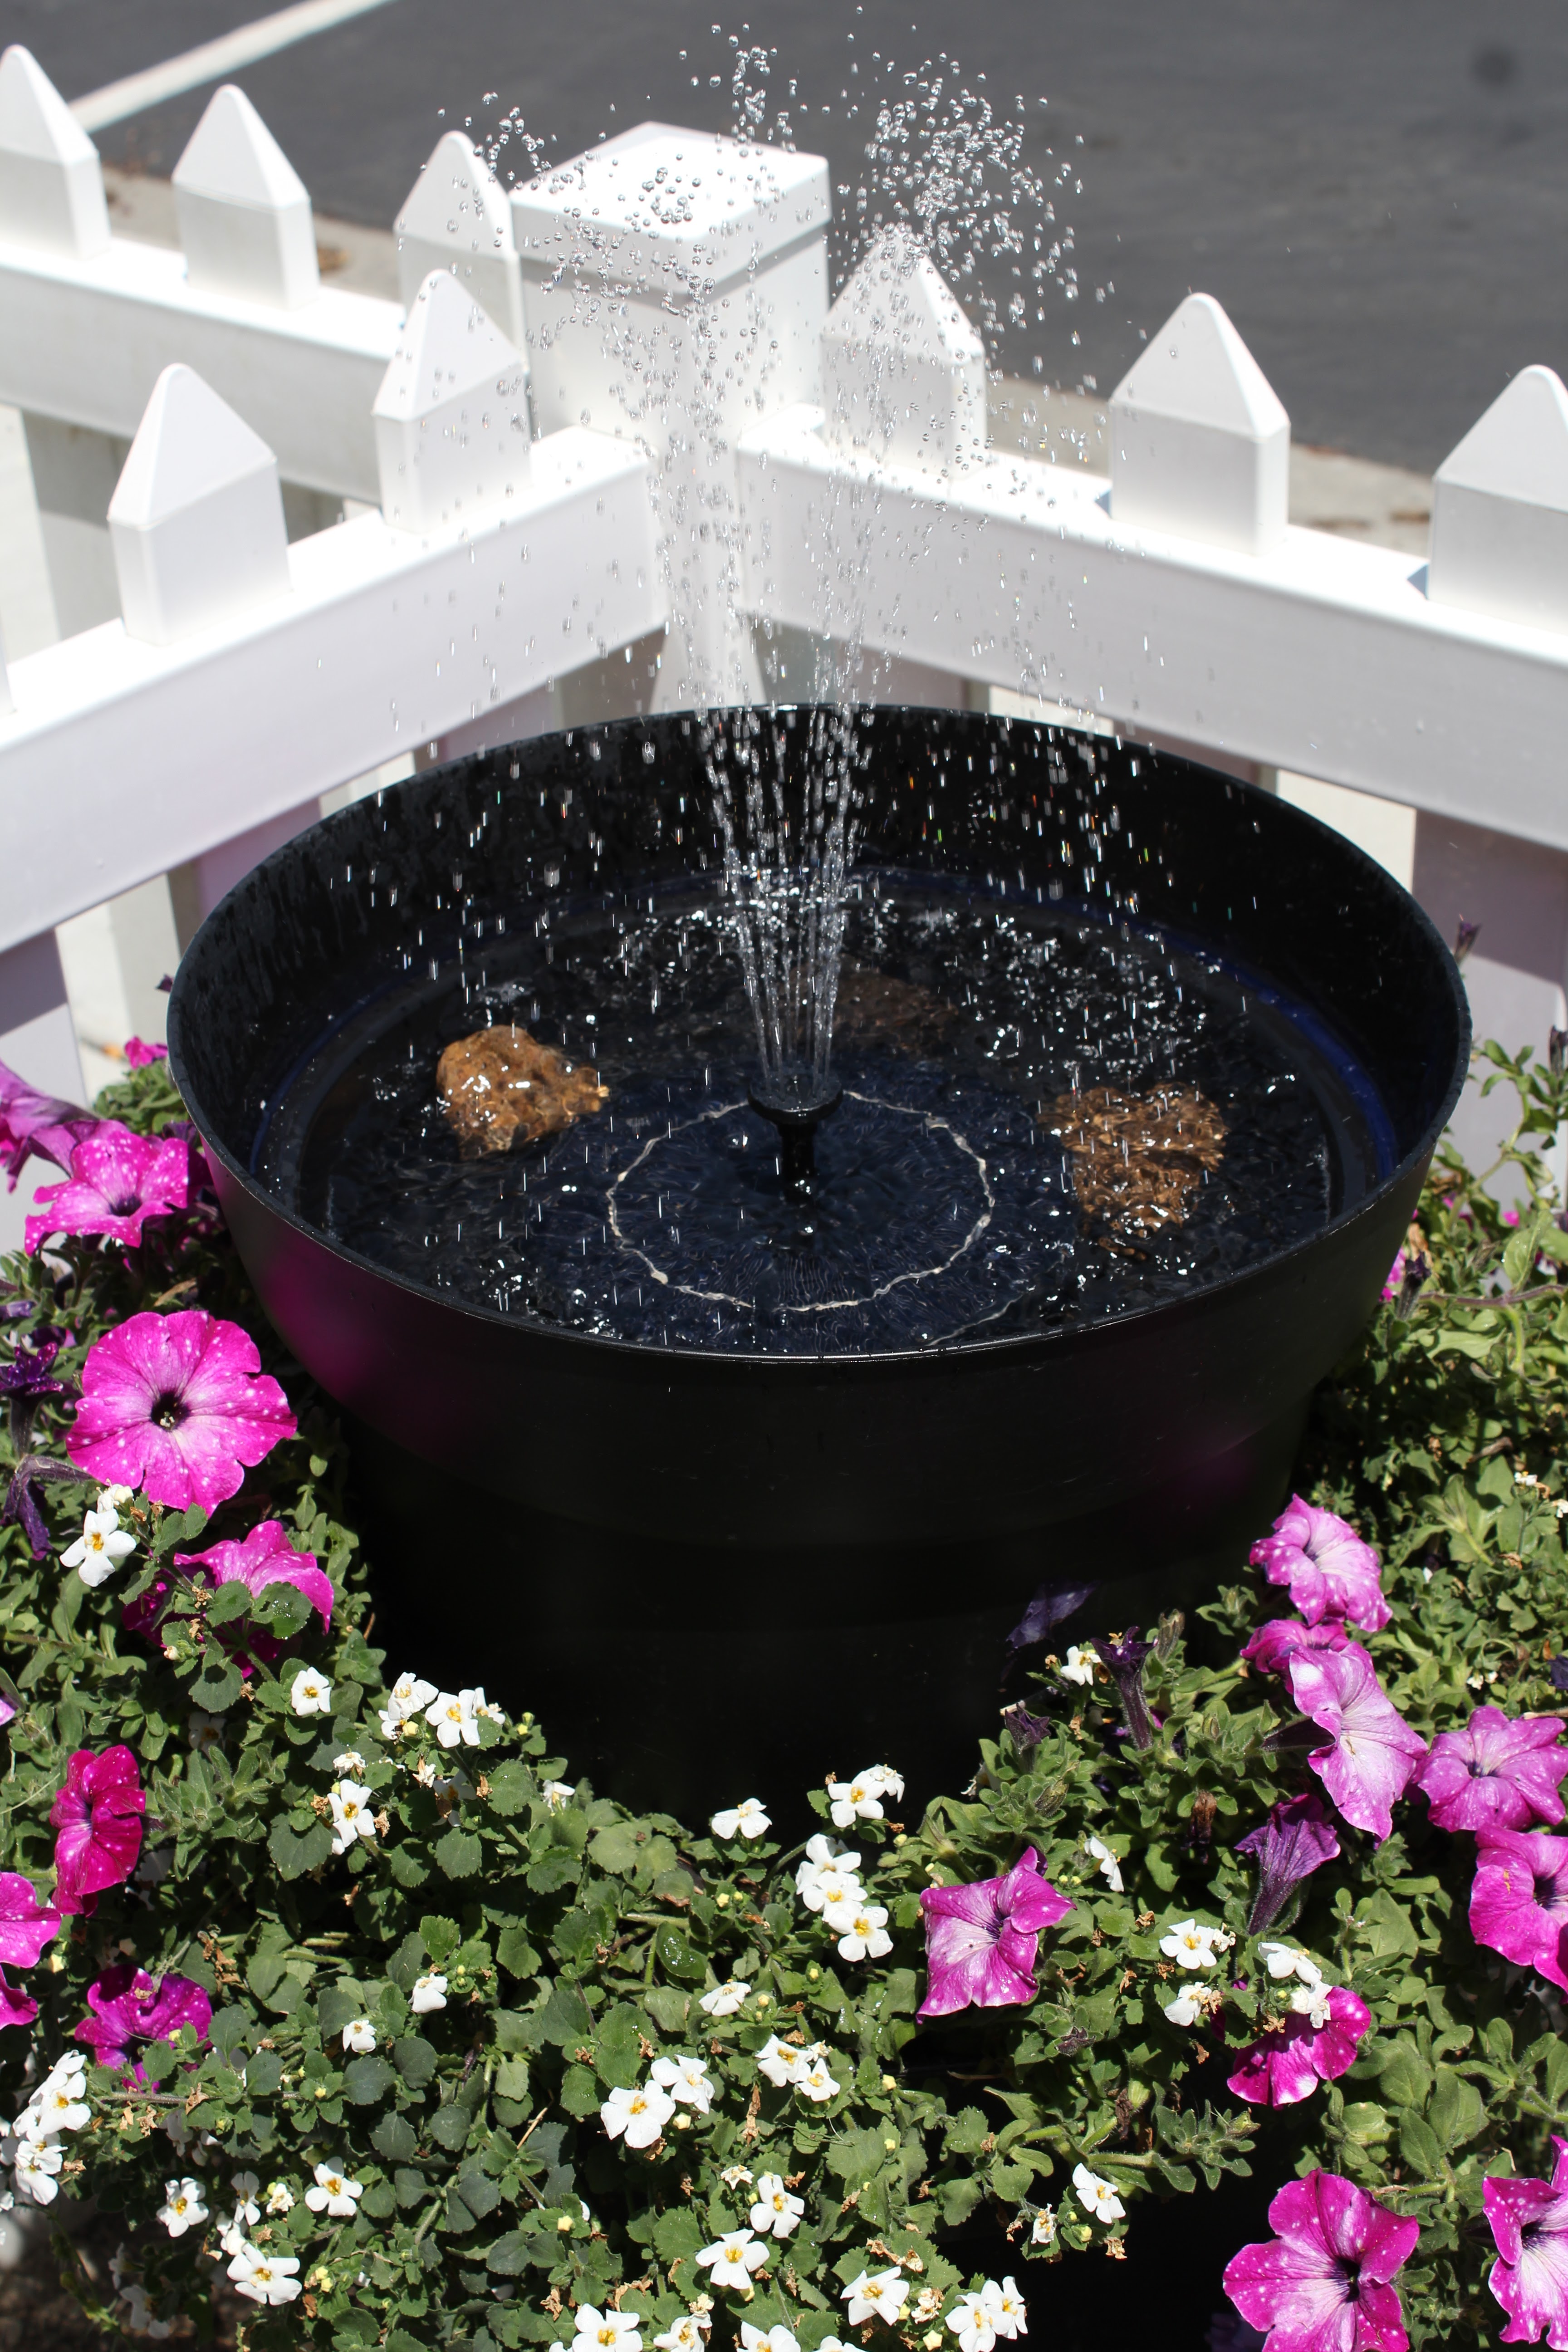

This little solar powered pump has got to be the best $23 I've ever spent! This corner gets full sun all day during the spring and summer months and even after the sun starts to set in the evening, this little pump continues to go! If the day starts off a bit cloudy then the little pump might not start to work right away but once the sun hits it, it starts spewing water. I love that it also comes with a few spout options to change the shape of the water feature. There's a couple of spouts that shoots the water out really high! I'd say about a foot and a half. I don't use that spout because the wind pushes the water out and then I have to keep filling the basin with water.


I love this DIY project so much that I'm thinking of making another water feature in our side yard where we would be able to see it from the dining room window and if I do, I'll make sure to let you know :)
I hope you found inspiration in this post! I'm here to answer any questions you might have. Just leave them in the comments.
'Till next time!
-Oscar
Love love love our little fountain! Thank you!
ReplyDelete